

📖 Estimated reading time: 8 min
It is designed to provide networking and security capabilities for K8S clusters. Developed by VMware, NSX-T Antrea integrates with NSX-T Data Center to extend its networking and security features to Kubernetes environments.
1 - Network Connectivity: NSX-T Antrea facilitates communication between pods (containers) within Kubernetes clusters, ensuring seamless connectivity across the cluster.
2 - Security Policies: It allows administrators to define fine-grained security policies to control traffic between pods, enhancing security within the Kubernetes environment.
3 - Policy Enforcement: NSX-T Antrea enforces network policies at the pod level, ensuring that only authorized communication occurs between pods, thus helping to prevent unauthorized access and potential security breaches.
4 - Integration with NSX-T Data Center: As part of the NSX-T suite, Antrea seamlessly integrates with NSX-T Data Center, leveraging its advanced networking and security capabilities to enhance Kubernetes environments.
Overall, NSX-T Antrea CNI simplifies the management of networking and security within Kubernetes clusters, providing administrators with the tools they need to build robust and secure containerized environments.
In this lab, we’ll be using OpenShift 4.12.45 and Antrea 1.8.0 (VMware Container Networking with Antrea 1.8.0).
* Antrea 1.9.0 requires additional components (Agent and Controller) which will not be covered in this post. We will therefore continue with version 1.8.0.
✅ Update: I recently successfully deployed OpenShift 4.16 with CNI Antrea 2.1. Although it’s not officially (yet) on the compatibility matrix (it hasn’t been approved), it’s working. Click HERE to see what needs to be adjusted in the Antrea manifests.

VMWare provided instructions about Container Networking with Antrea.
They can be found here and here.
Information about the Antrea Operator upgrade can be found here.
- There is also an old post about this here.
Antrea files can be downloaded from https://downloads.vmware.com. A valid user with access to an active subscription must be used.
For the installation, you will need the Antrea container image and the Antrea Kubernetes Operator container image.
These images must be made available in a Container Registry of your choice.
💡 You must upload the downloaded images to a docker compatible registry.
⚠️ If you don’t know how to upload Antrea images to a docker registry, take a look at this post.
After you upload the images to a registry, check pulling them before proceeding. Example:
 $ podman pull docker.io/YOUR-DOCKERHUB-USERNAME/antrea-operator:v1.13.1_vmware.1

 $ podman pull docker.io/YOUR-DOCKERHUB-USERNAME/antrea-ubi:v1.13.1_vmware.1
You can use Antrea as a network CNI for your OpenShift or Kubernetes cluster, regardless of whether you have NSX running in your environment.
⛔️ Please note that after the cluster is installed, the CNI cannot be changed.
You may now be wondering: Why would I do that? 🤔
Well, you shouldn’t, unless you want to learn something different, or you’re working on an OpenShit integration with NSX-T.
This task consists of 2 phases:
1) Deploy the OCP cluster using the Antrea “networkType” instead of OVNKubermetes.
2) Integrating the OCP cluster with NSX-T.
✅ You can integrate the OpenShift cluster with Antrea as the CNI with NSX-T at any time after the OpenShift cluster is created.
NOTE: In this lab, we’ll only cover the first phase, which is usually more complex. Phase 2 can be completed with the reading indicated at the beginning of this post.
Create a subdirectory named “antrea-ocp” and place the necessary files in it.
  $ pwd
  /root/antrea-ocp
I’ve organized my directories in this way to make the process easier to understand.
  $ tree

  .
  ├── 1-ocp-deploy-with-nsx-antrea
  │   ├── operator_image
  │   └── operator_manifests
  ├── 2-ocp-nsx-integration
  │   └── interworking
  ├── auth
  ├── deploy
  │   ├── kubernetes
  │   └── openshift
  └── tls
First, create the install-config.yaml file, as we need to customize it a bit.
$ openshift-install create install-config --dir .
On your install-config.yaml, look for networkType and replace OVNKubernetes by antrea.
 $ cat install-config.yaml.tmp
   (...)
   networkType: antrea
   (...)
Backup your install-config.yaml:
$ cp install-config.yaml install-config.yaml.tmp
Create the default openshift manifests. We’ll need to copy the antrea operator manifests to the openshift default manifest directory.
🔸 Your install-config.yaml must be correctly configured for this step to work.
$ openshift-install create manifests --dir .
Now we have several files on our antrea-ocp directory:
  $ tree

  .
  ├── 1-ocp-deploy-with-nsx-antrea
  │   ├── operator_image
  │   │   ├── antrea-operator-v1.13.1_vmware.1.tar.gz
  │   └── operator_manifests
  │       ├── deploy.tar.gz
  ├── 2-ocp-nsx-integration
  │   └── interworking
  │       ├── interworking-ubi-0.13.0_vmware.1.tar
  ├── install-config.yaml.tmp
  ├── manifests
  │   ├── cloud-provider-config.yaml
  │   ├── cluster-config.yaml
  │   ├── cluster-dns-02-config.yml
  │   ├── cluster-infrastructure-02-config.yml
  │   ├── cluster-ingress-02-config.yml
  │   ├── cluster-network-01-crd.yml
  │   ├── cluster-network-02-config.yml
  │   ├── cluster-proxy-01-config.yaml
  │   ├── cluster-scheduler-02-config.yml
  │   ├── cvo-overrides.yaml
  │   ├── kube-cloud-config.yaml
  │   ├── kube-system-configmap-root-ca.yaml
  │   ├── machine-config-server-tls-secret.yaml
  │   └── openshift-config-secret-pull-secret.yaml
  └── openshift
      ├── 99_cloud-creds-secret.yaml
      ├── 99_kubeadmin-password-secret.yaml
      ├── 99_openshift-cluster-api_master-machines-0.yaml
      ├── 99_openshift-cluster-api_master-machines-1.yaml
      ├── 99_openshift-cluster-api_master-machines-2.yaml
      ├── 99_openshift-cluster-api_master-user-data-secret.yaml
      ├── 99_openshift-cluster-api_worker-machineset-0.yaml
      ├── 99_openshift-cluster-api_worker-user-data-secret.yaml
      ├── 99_openshift-machineconfig_99-master-ssh.yaml
      ├── 99_openshift-machineconfig_99-worker-ssh.yaml
      ├── 99_role-cloud-creds-secret-reader.yaml
      └── openshift-install-manifests.yaml
      .
🔴 Pay attention because this is the most sensible part. We’ll need to place some Antrea operator files inside the OpenShift manifest directory.
Uncompress the Antrea Operator deployment manifests:
  $ tar xzvf 1-ocp-deploy-with-nsx-antrea/operator_manifests/deploy.tar.gz

  deploy/
  deploy/kubernetes/
  deploy/kubernetes/namespace.yaml
  deploy/kubernetes/nsx-cert.yaml
  deploy/kubernetes/operator.antrea.vmware.com_antreainstalls_crd.yaml
  deploy/kubernetes/operator.antrea.vmware.com_v1_antreainstall_cr.yaml
  deploy/kubernetes/operator.yaml
  deploy/kubernetes/role.yaml
  deploy/kubernetes/role_binding.yaml
  deploy/kubernetes/service_account.yaml
  deploy/openshift/
  deploy/openshift/namespace.yaml
  deploy/openshift/nsx-cert.yaml
  deploy/openshift/operator.antrea.vmware.com_antreainstalls_crd.yaml
  deploy/openshift/operator.antrea.vmware.com_v1_antreainstall_cr.yaml
  deploy/openshift/operator.yaml
  deploy/openshift/role.yaml
  deploy/openshift/role_binding.yaml
  deploy/openshift/service_account.yaml
Now our directory should look like this:
  $ tree -d
  .
  ├── 1-ocp-deploy-with-nsx-antrea
  │   ├── operator_image
  │   └── operator_manifests
  ├── 2-ocp-nsx-integration
  │   └── interworking
  ├── deploy    <----- ANTREA OPERATOR MANIFESTS
  │   ├── kubernetes
  │   └── openshift
  ├── manifests
  └── openshift

  10 directories
2 files must be customized:
- operator.yaml
- operator.antrea.vmware.com_v1_antreainstall_cr.yaml
In these files, enter the URL of the docker registry where the images were uploaded.
  $ grep -A3 containers deploy/openshift/operator.yaml
        containers:
          - name: antrea-operator
            # Replace this with the built image name
            image: ReplaceOperatorImage
  $ grep antreaImage deploy/openshift/operator.antrea.vmware.com_v1_antreainstall_cr.yaml
    antreaImage: ReplaceAntreaImage
They should look like this:
  $ grep -A3 containers deploy/openshift/operator.yaml
        containers:
          - name: antrea-operator
            # Replace this with the built image name
            image: docker.io/YOUR-DOCKERHUB-USERNAME/antrea-operator:v1.13.1_vmware.1
  $ grep antreaImage deploy/openshift/operator.antrea.vmware.com_v1_antreainstall_cr.yaml
    antreaImage: docker.io/YOUR-DOCKERHUB-USERNAME/antrea-ubi:v1.13.1_vmware.1
Copy the Antrea operator manifest files to OpenShift’s manifests directory.
  $ pwd
  /root/antrea-ocp
  $ ls -l
  total 16
  drwxr-xr-x. 4 root root   71 Apr 19 11:14 1-ocp-deploy-with-nsx-antrea
  drwxr-xr-x. 3 root root   43 Apr 19 11:18 2-ocp-nsx-integration
  drwxr-xr-x. 4  201  201   41 Mar 25 23:29 deploy
  -rw-r--r--. 1 root root 4747 Apr 19 14:03 install-config.yaml.tmp
  drwxr-x---. 2 root root 4096 Apr 19 14:12 manifests
  drwxr-x---. 2 root root 4096 Apr 19 14:12 openshift
$ cp deploy/openshift/* manifests/
It may be a good idea to make a backup of the “antrea-ocp” directory before attempting the cluster installation.
  $ cd ..
  $ tar cpzvf antrea-ocp.tar.gz antrea-ocp/deploy \
    antrea-ocp/manifests antrea-ocp/install-config.yaml.tmp
Now all you have to do is install the OpenShift cluster, taking care to point it to the directory where all the files are located:
  $ cd antrea-ocp
  $ openshift-install create cluster --dir . --log-level debug
And the OpenShift cluster is live using CNI Antrea. Nice! 😎
  INFO Checking to see if there is a route at openshift-console/console...
  DEBUG Route found in openshift-console namespace: console
  DEBUG OpenShift console route is admitted
  INFO Install complete!
  INFO To access the cluster as the system:admin user when using 'oc', run 'export KUBECONFIG=/root/antrea-ocp/auth/kubeconfig'
  INFO Access the OpenShift web-console here: https://console-openshift-console.apps.example.com
  INFO Login to the console with user: "kubeadmin", and password: "BgitS-SrrMS-qehQz-haqjx"
  DEBUG Time elapsed per stage:
  DEBUG      pre-bootstrap: 27s
  DEBUG          bootstrap: 13s
  DEBUG             master: 18s
  DEBUG Bootstrap Complete: 14m29s
  DEBUG                API: 2m7s
  DEBUG  Bootstrap Destroy: 43s
  DEBUG  Cluster Operators: 12m52s
  INFO Time elapsed: 29m10s
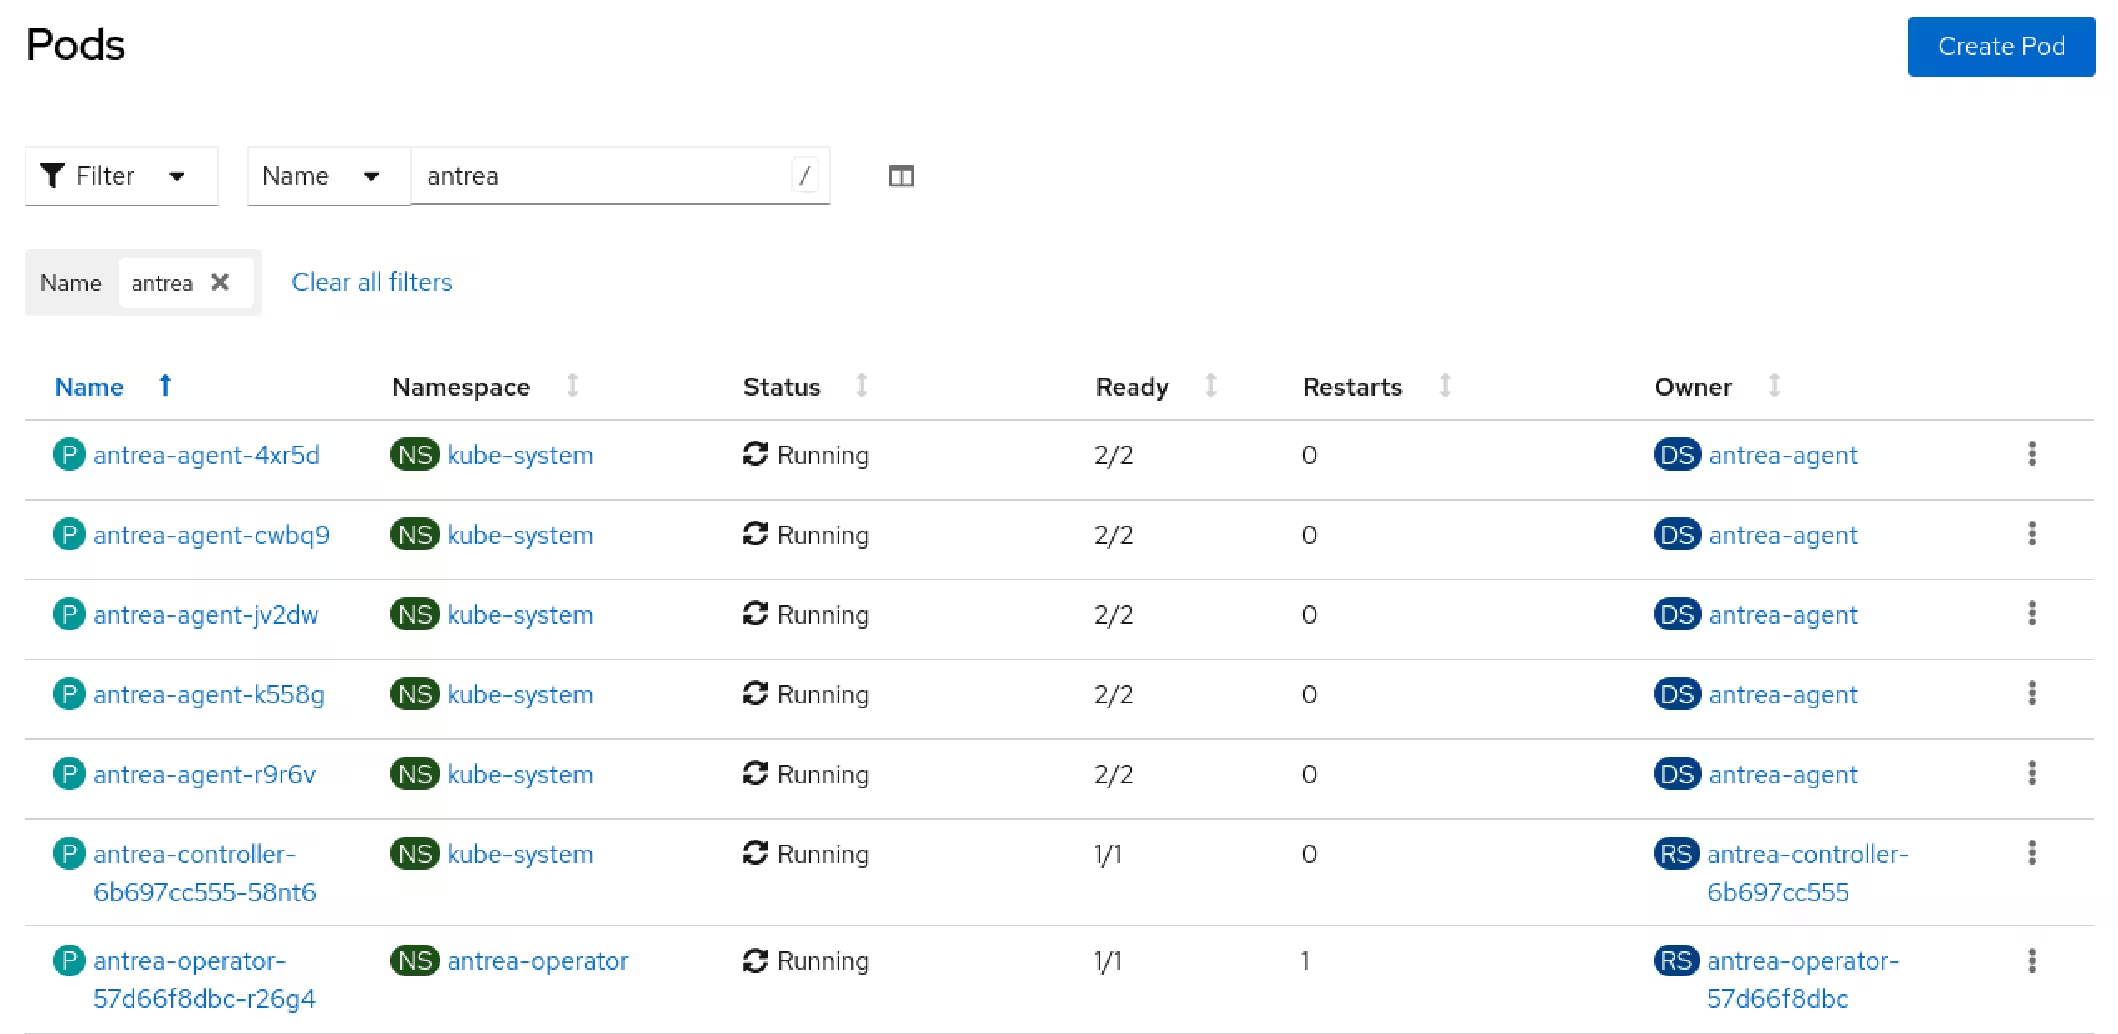
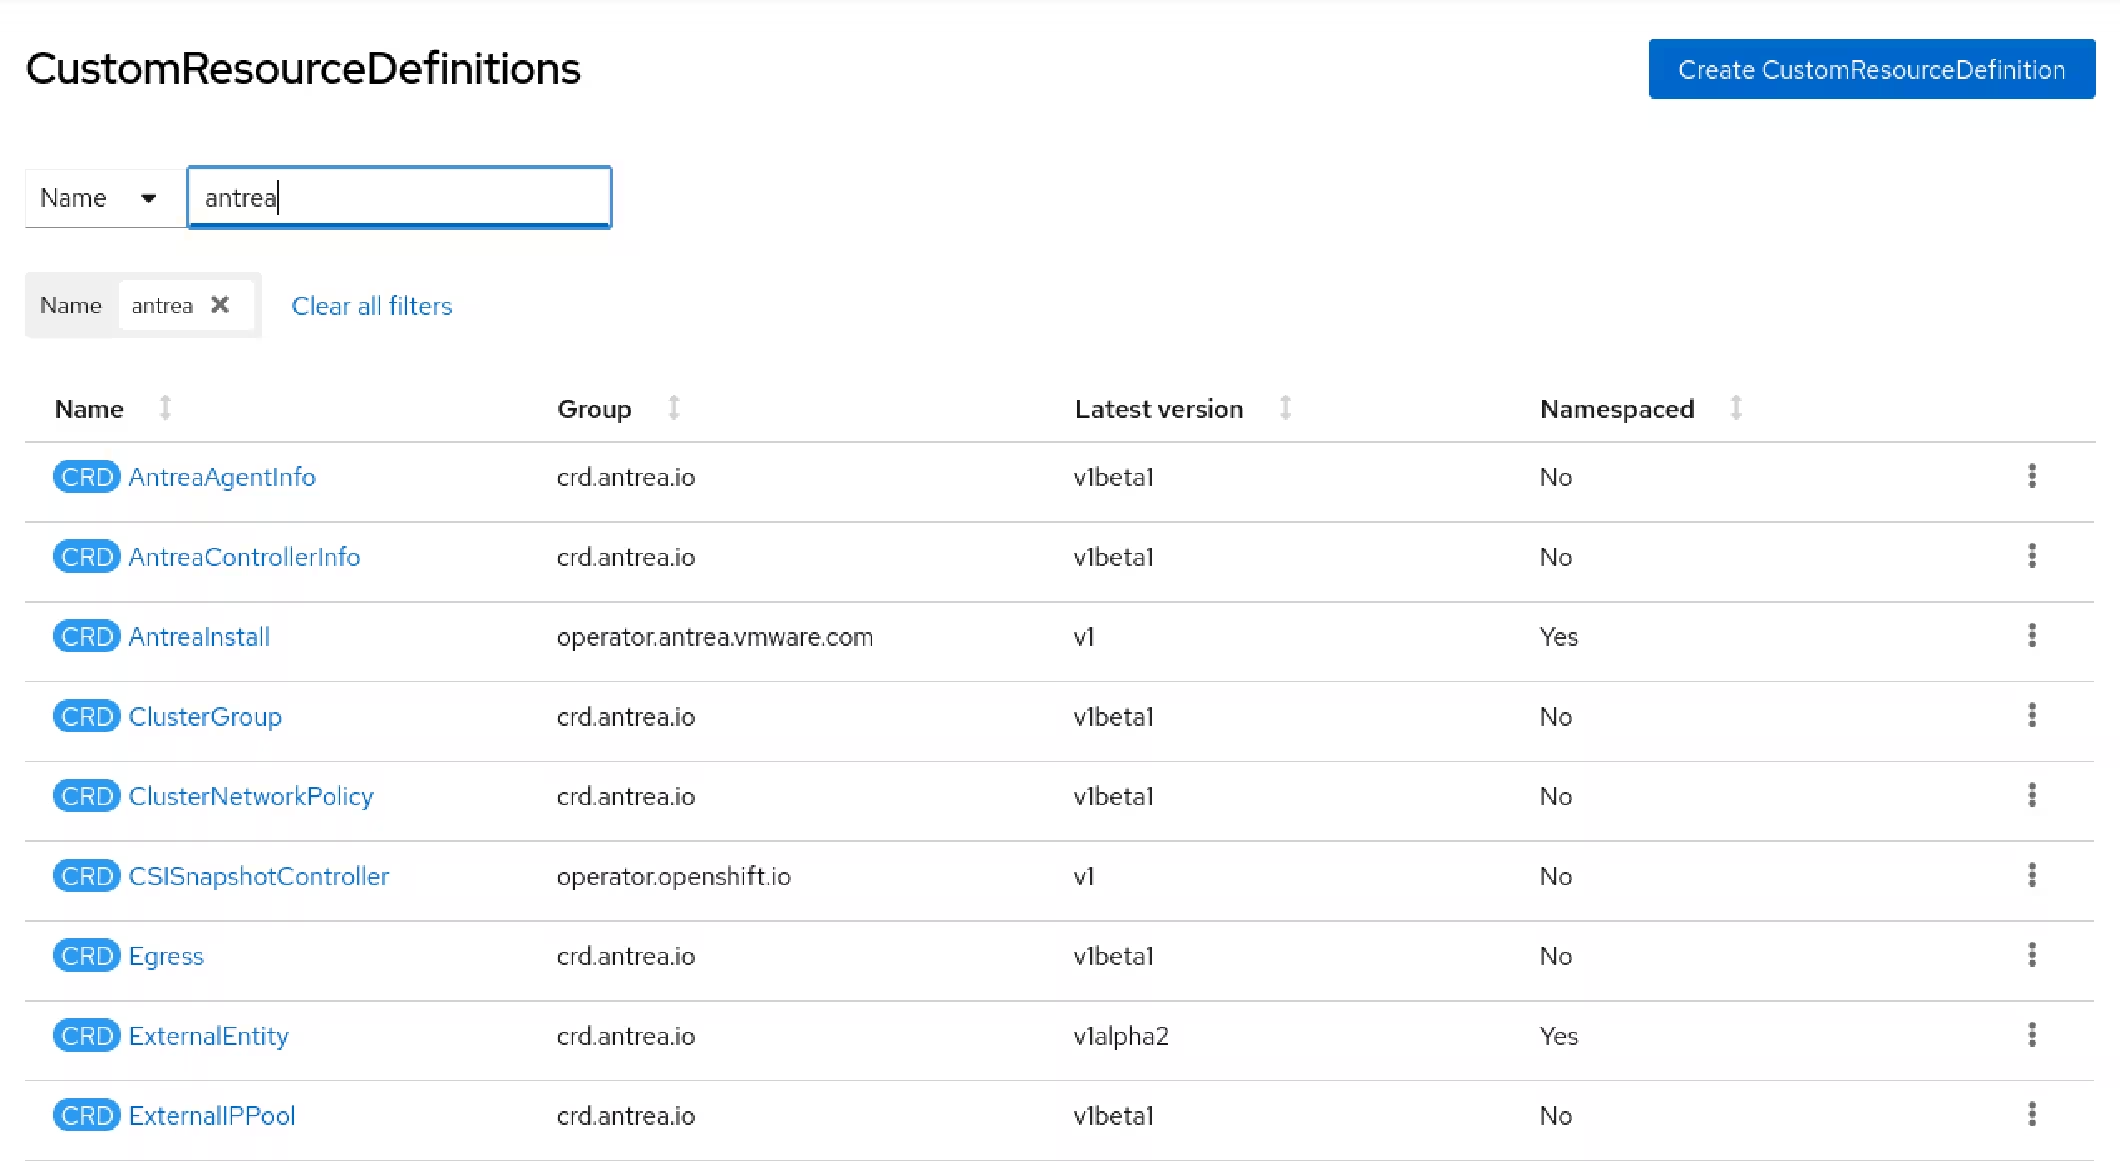
Antrea creates several resources on the OpenShift cluster.


Antrea makes the internal OpenShift networks routable. 🔥
☑️ This behavior is already known to those who use MetalLB in Baremetal implementations.

As for an example, in this lab the OpenShift cluster uses the following networks:
Source:
  machineNetwork:
  - cidr: 10.1.224.0/24
Destination:
  networking:
    clusterNetwork:
    - cidr: 10.128.0.0/14
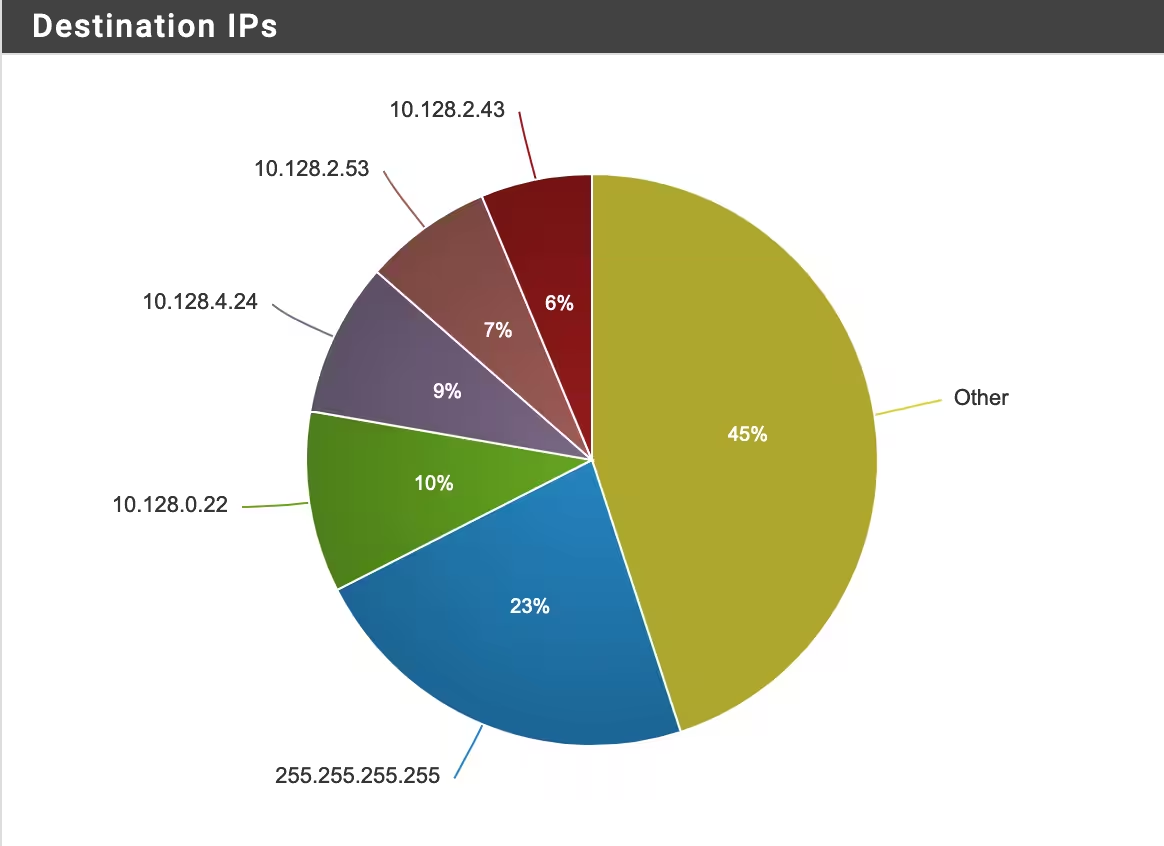
Your firewall will probably block these communications (like mine).

And your cluster will have trouble communicating on the local network.

Because the internal networks were routed through Antrea, the machineNetwork will try to reach clusterNetwork on TCP ports:
* 8443
* 8080
* 8181
They must be allowed on firewall.

⚠️ Probably other ports needs to be allowed. Monitor your firewall logs to spot them.
That’s it. I don’t know if anyone will want to use this solution. But that’s how it’s done.
In this version, it is no longer necessary to upload Antrea images to a private registry. VMWare has made the images publicly available.
Container images on Broadcom Artifactory are below.
Antrea images:

    projects.packages.broadcom.com/antreainterworking/antrea-standard-controller-debian:v2.1.0_vmware.3

    projects.packages.broadcom.com/antreainterworking/antrea-standard-agent-debian:v2.1.0_vmware.3

    projects.packages.broadcom.com/antreainterworking/antrea-advanced-controller-debian:v2.1.0_vmware.3

    projects.packages.broadcom.com/antreainterworking/antrea-advanced-agent-debian:v2.1.0_vmware.3

    projects.packages.broadcom.com/antreainterworking/antrea-controller-ubi:v2.1.0_vmware.3

    projects.packages.broadcom.com/antreainterworking/antrea-agent-ubi:v2.1.0_vmware.3

Antrea multi-cluster controller images:

    projects.packages.broadcom.com/antreainterworking/antrea-mc-controller-debian:v2.1.0_vmware.3

    projects.packages.broadcom.com/antreainterworking/antrea-mc-controller-ubi:v2.1.0_vmware.3

Antrea flow-aggregator images:

    projects.packages.broadcom.com/antreainterworking/flow-aggregator-ubi:v2.1.0_vmware.3

    projects.packages.broadcom.com/antreainterworking/flow-aggregator-debian:v2.1.0_vmware.3

Antrea IDPS images:

    IDPS controller and agent

        projects.packages.broadcom.com/antreainterworking/idps-debian:v2.1.0_vmware.3

        projects.packages.broadcom.com/antreainterworking/idps-ubi:v2.1.0_vmware.3

    Suricata

        projects.packages.broadcom.com/antreainterworking/suricata:v2.1.0_vmware.3

Antrea ODS image:

    projects.packages.broadcom.com/antreainterworking/antrea-ods-debian:v2.1.0_vmware.3

Operator image:

    projects.packages.broadcom.com/antreainterworking/antrea-operator:v2.1.0_vmware.3

Antrea-NSX images:

    projects.packages.broadcom.com/antreainterworking/interworking-debian:1.1.0_vmware.1

    projects.packages.broadcom.com/antreainterworking/interworking-ubuntu:1.1.0_vmware.1

    projects.packages.broadcom.com/antreainterworking/interworking-photon:1.1.0_vmware.1

    projects.packages.broadcom.com/antreainterworking/interworking-ubi:1.1.0_vmware.1
⚠️ However, access to deploy manifests is only available with an active subscription.
I recently deployed an OpenShift 4.16.24 with CNI Antrea v2.1.0. Even though this combination of software is not in the current compatibility matrix, everything worked without any major problems.

The procedure is similar, with just a few changes to the install-config.yaml and Antrea deployment manifests.
Here are the configuration steps.
 $ cd antrea-ocp
 $ cp install-config.yaml.bkp install-config.yaml
 $ openshift-install create install-config --dir .
 $ openshift-install create manifests --dir .
 $ tar xzvf deploy.tar.gz <---- ANTREA DEPLOYMENT MANIFESTS
 $ cd deploy
 $ grep broadcom.com deploy/openshift/* -r
 deploy/openshift/operator.antrea.vmware.com_v1_antreainstall_cr.yaml:  antreaAgentImage: projects.packages.broadcom.com/antreainterworking/antrea-agent-ubi:v2.1.0_vmware.3

 deploy/openshift/operator.antrea.vmware.com_v1_antreainstall_cr.yaml:  antreaControllerImage: projects.packages.broadcom.com/antreainterworking/antrea-controller-ubi:v2.1.0_vmware.3

 deploy/openshift/operator.antrea.vmware.com_v1_antreainstall_cr.yaml:  interworkingImage: projects.packages.broadcom.com/antreainterworking/interworking-ubi:1.1.0_vmware.1

 deploy/openshift/operator.yaml:          image: projects.packages.broadcom.com/antreainterworking/antrea-operator:v2.1.0_vmware.3
$ cd ..
$ cp deploy/openshift/* manifests/
$ openshift-install create cluster --dir . --log-level debug
 INFO All cluster operators have completed progressing
 INFO Checking to see if there is a route at openshift-console/console...
 INFO Install complete!
 INFO To access the cluster as the system:admin user when using 'oc', run 'export KUBECONFIG=/root/antrea-ocp/auth/kubeconfig'
 INFO Access the OpenShift web-console here: https://console-openshift-console.apps.example.com
 INFO Login to the console with user: "kubeadmin", and password: "zZM2N-MzQDw-FaFsC-Vv4QH"
 INFO Time elapsed: 41m31s

Good luck with your implementation! 😆

Did you like the content? Check out these other interesting articles! 🔥
Do you like what you find here? With every click on a banner, you help keep this site alive and free. Your support makes all the difference so that we can continue to bring you the content you love. Thank you very much! 😊