📖 Estimated reading time: 2 min
In this article I’ll teach you how to install the sysdig agent on a Kubernetes cluster. We’ll be working with OpenShift, but the process is the same for other Kubernetes platforms.
The first thing you need to do is get a sysdig activation key. Register at the URL below to get yours.
https://sysdig.com/company/free-trial-platform/
The installation is based on a helm chart, which makes it very easy to do. If you don’t already have the helm binary, just install it with a few commands:
$ curl -L https://mirror.openshift.com/pub/openshift-v4/clients/helm/latest/helm-linux-amd64 -o /usr/local/bin/helm
$ chmod +x /usr/local/bin/helm
$ helm version
version.BuildInfo{Version:"v3.11.1+6.el8", GitCommit:"66bfc44f827aea6eb8e001150914170ac0d49e2d", GitTreeState:"clean", GoVersion:"go1.18.9"}
Get your cluster’s name:
$ oc cluster-info | grep -oP 'https:\/\/api.\K[^.]+'

homelab
Add the repository:
$ helm repo add sysdig https://charts.sysdig.com\
$ helm repo update
Create a new project (namespace) for the sysdig agent and associate a Security Context Constraints:
$ oc new-project sysdig-agent\
$ oc adm policy add-scc-to-user nonroot -z default -n sysdig-agent
Note: If you are on another flavor of Kubernetes, use the command “kubectl” instead of oc.
Now just install the agent:
$ helm install sysdig-agent --namespace sysdig-agent\
--set global.sysdig.accessKey=**FORNECIDA-DURANTE-REGISTRO-NA-SYSDIG**\
--set global.sysdig.region=**FORNECIDA-DURANTE-REGISTRO-NA-SYSDIG**\
--set nodeAnalyzer.secure.vulnerabilityManagement.newEngineOnly=true\
--set global.kspm.deploy=true\
--set nodeAnalyzer.nodeAnalyzer.benchmarkRunner.deploy=true\
--set global.clusterConfig.name=**homelab**\
--set agent.ebpf.enabled=true\
sysdig/sysdig-deploy
It’s as simple as that. Finally, check that all the PODs in the sysdig agent are running.

Check out the DaemonSets.

If you need to analyze all the details of the DS, run the following command.
$ oc get ds sysdig-agent -n sysdig-agent -o yaml
Tip: There is a more advanced way of installing the agent, where we can make various tunings in a values.yaml file that will be read by the installer when the agent is deployed.
If you need to uninstall the agent, just run the following commands.
$ helm uninstall sysdig-agent --namespace sysdig-agent\
$ oc delete namespace sysdig-agent
The address for accessing the dashboard is informed during registration. It should be a URL similar to the one shown below.


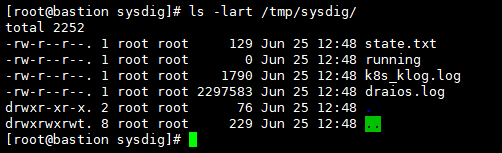
In case of problems, copy the agent logs to the local disk for analysis.
$ kubectl cp -n sysdig-agent sysdig-agent-cczwk:/opt/draios/logs /tmp/sysdig
If the data is not appearing on the Sysdig dashboard, check that the kubernetes cluster can access it via the internet.

That was pretty easy, wasn’t it? The installer does almost all the work itself.
That’s it for now. In the next article we’ll look at how to install and configure the Registry Scanner.
Did you like the content? Check out these other interesting articles! 🔥
Do you like what you find here? With every click on a banner, you help keep this site alive and free. Your support makes all the difference so that we can continue to bring you the content you love. Thank you very much! 😊